This Antix White Multi Frame (at Conranusa.com for $225) appeared in the July issue of InStyle magazine. I loved the frame immediately, but not the price.
So I decided to make it myself...
Supplies:
- Various frames
- 1/4" MDF
- sandpaper
- wood glue
- spray paint
Step 1: Purchase various frames.
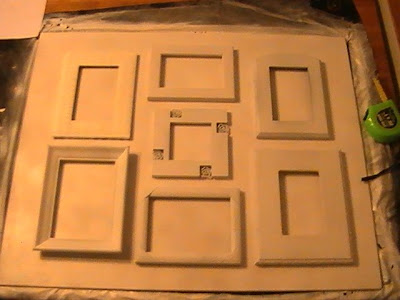
 I found seven frames at thrift stores for an average of $1 a piece. It doesn't matter what they look like since they will be painted, but these are all wood (or pressed wood) so that I can work with them easier.
 Step 2: Cut mdf to the appropriate size.
Step 3: Sand edges of MDF.
Step 4: Make a slot on the top edge of each frame.
 This will allow you to change photos. We used a router (at a depth of ~1/16" to do the job, but if you don't have a router, you could use a dremel, a chisel, or sandpaper (or all three).
Step 5: Sand slot to smooth edges.

Step 6: Scuff the front of any glossy frames.
Step 7: Spray paint each frame.
 Following carefully the directions on the spray paint can will produce the best results.
Measure carefully and mark them.
Step 10: Use wood glue to attach each frame to the backing.
 As you're placing the weight, be careful not to shift the frames. (I did, but didn't notice until I saw these pictures. When you get to the end, can you tell which frame is not straight?)
Step 12: Spray paint one final coat.
Step 14: Display!
Total cost: $21.
Total time: 2-3 hours
- Frames: $7
- MDF backing: $5
- Spray paint: $8
- Sandpaper: in garage ($2-$3 at home improvement center)
- Wood glue: in laundry room ($2-$3 at home improvement center)
- Picture hanging hardware: $1
Tips:
- Choose frames that are different from each other. Find ones that have embellishments to add character.
- As a rule of thumb, an odd number of frames will please the eyes more. Seven seemed to work well.
Did you find it? It's the top right. I hope it doesn't drive me crazy!


